CUT-AND-ASSEMBLE PAPER EAR MODEL
Background information:
For a really good explanation of how the parts of this model work, go to YouTube and search for “Process of Hear-
ing Animation” posted by psy113. Then watch “How the Ear Works” posted by Javitzproductions. For an excellent expla-
nation of how the semicircular canals work, try “How the Inner Ear Balance System Works” posted by Fauquier ENT.
Of course, any anatomy book will also give explanations for all these parts. The advantage of these videos is that they
show 3D views and moving parts.
You will need:
• copies of the pattern pages printed onto lightweight card stock (vellum bristol is ne, or 65 or 90 pound card stock)
• scissors and X-acto knife
• white glue or good quality glue stick (I always advise against “school glue.”)
TIP: To get these parts to stick, press and hold each tab/joint for a count of 10. Patience will pay off!
Assembly:
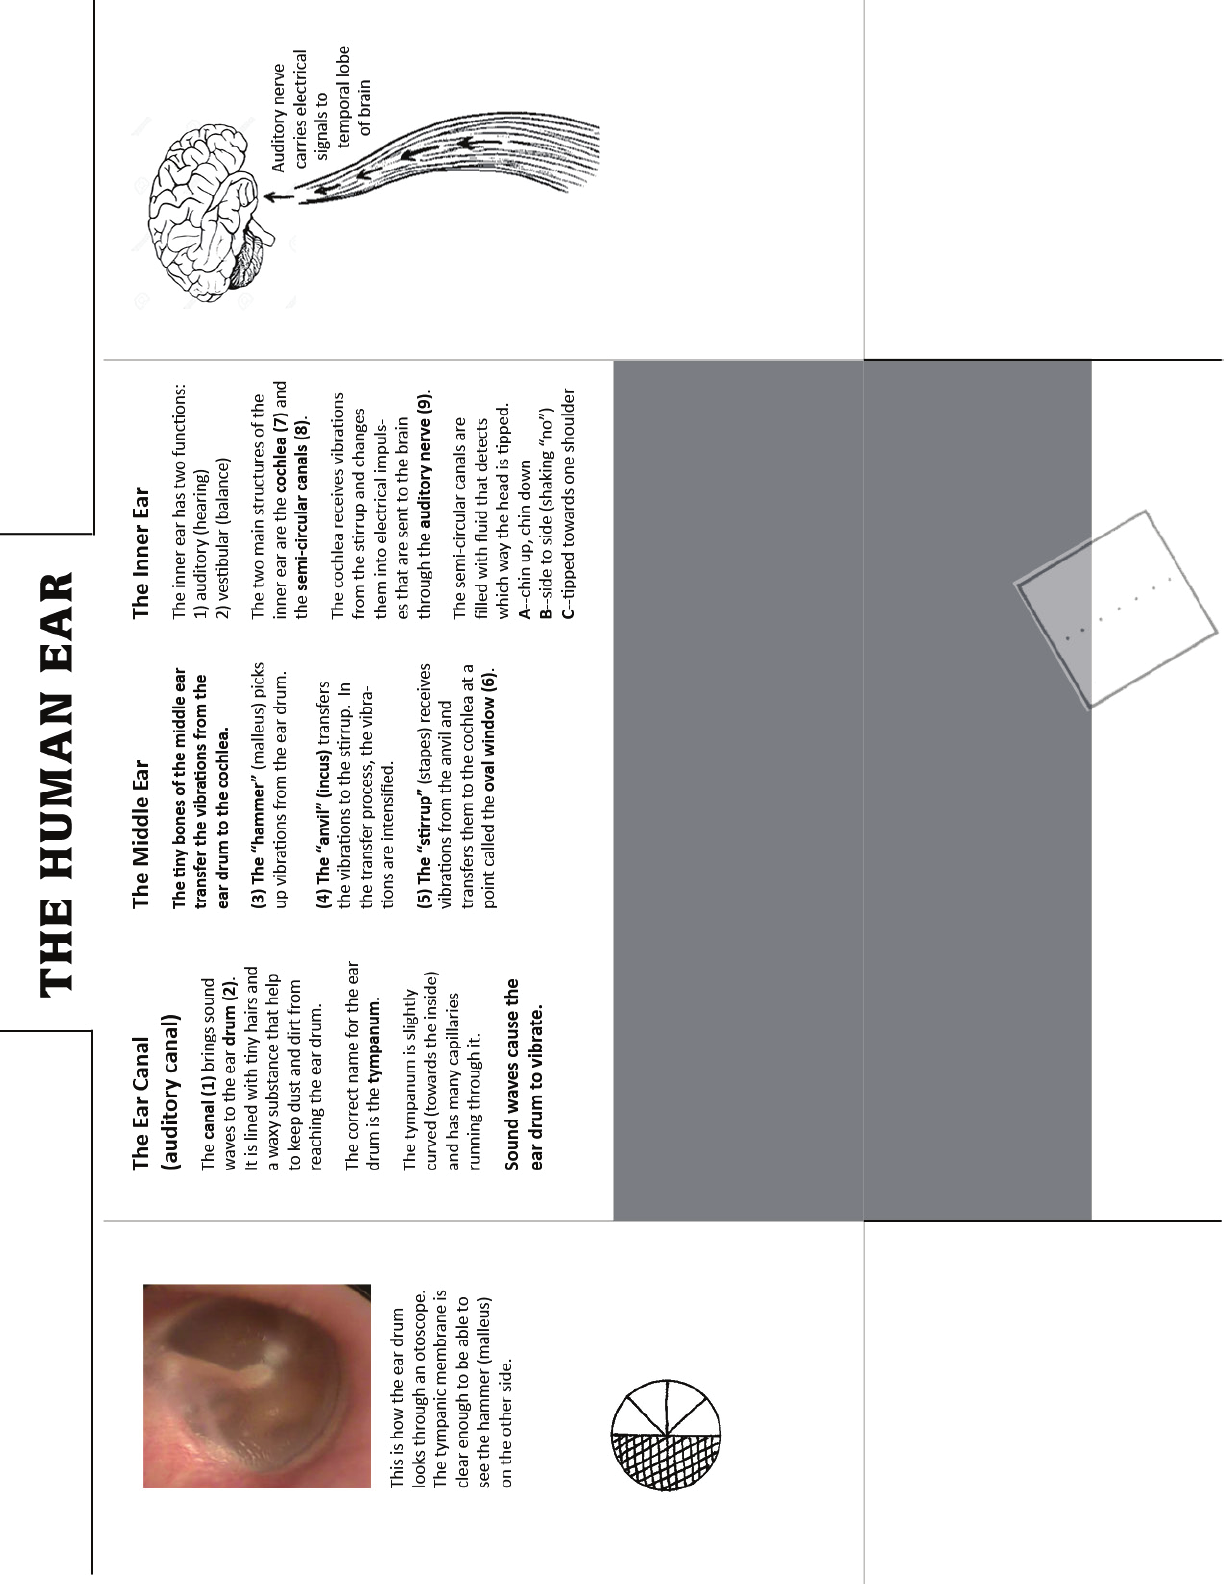
BOX:
1) Cut along dark lines (that are shown here in red).
2) Cut out the yellow areas.
3) Cut out cross-hatched semi-
circle, and cut along “wedge” lines.
4) Fold along light gray lines.
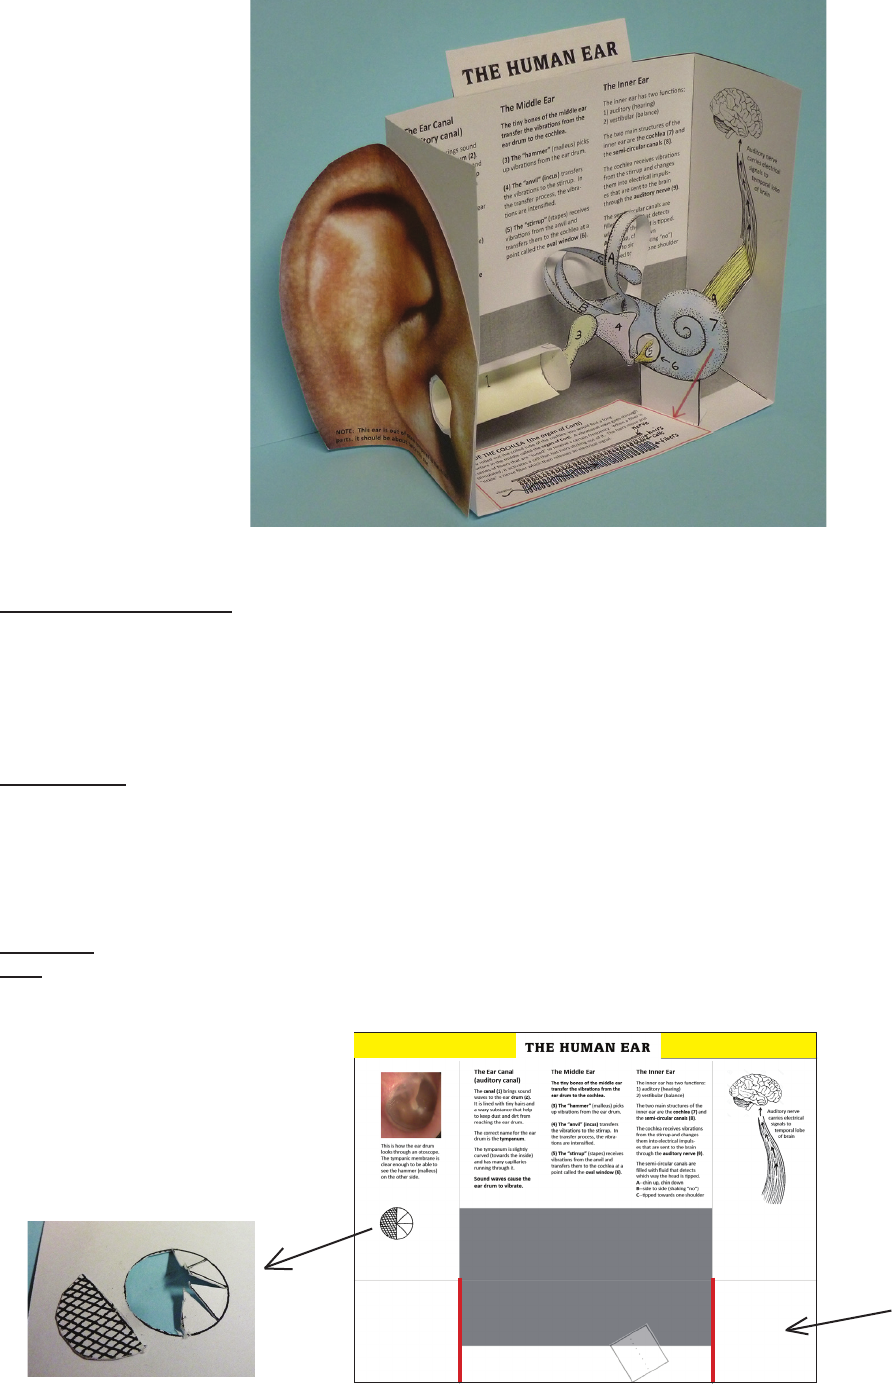
5) Fold into box shape as shown in
main picture above, and glue bottom
aps underneath.
6) Fold title [THE HUMAN EAR] back.
These squares will
go under the gray
rectangle.
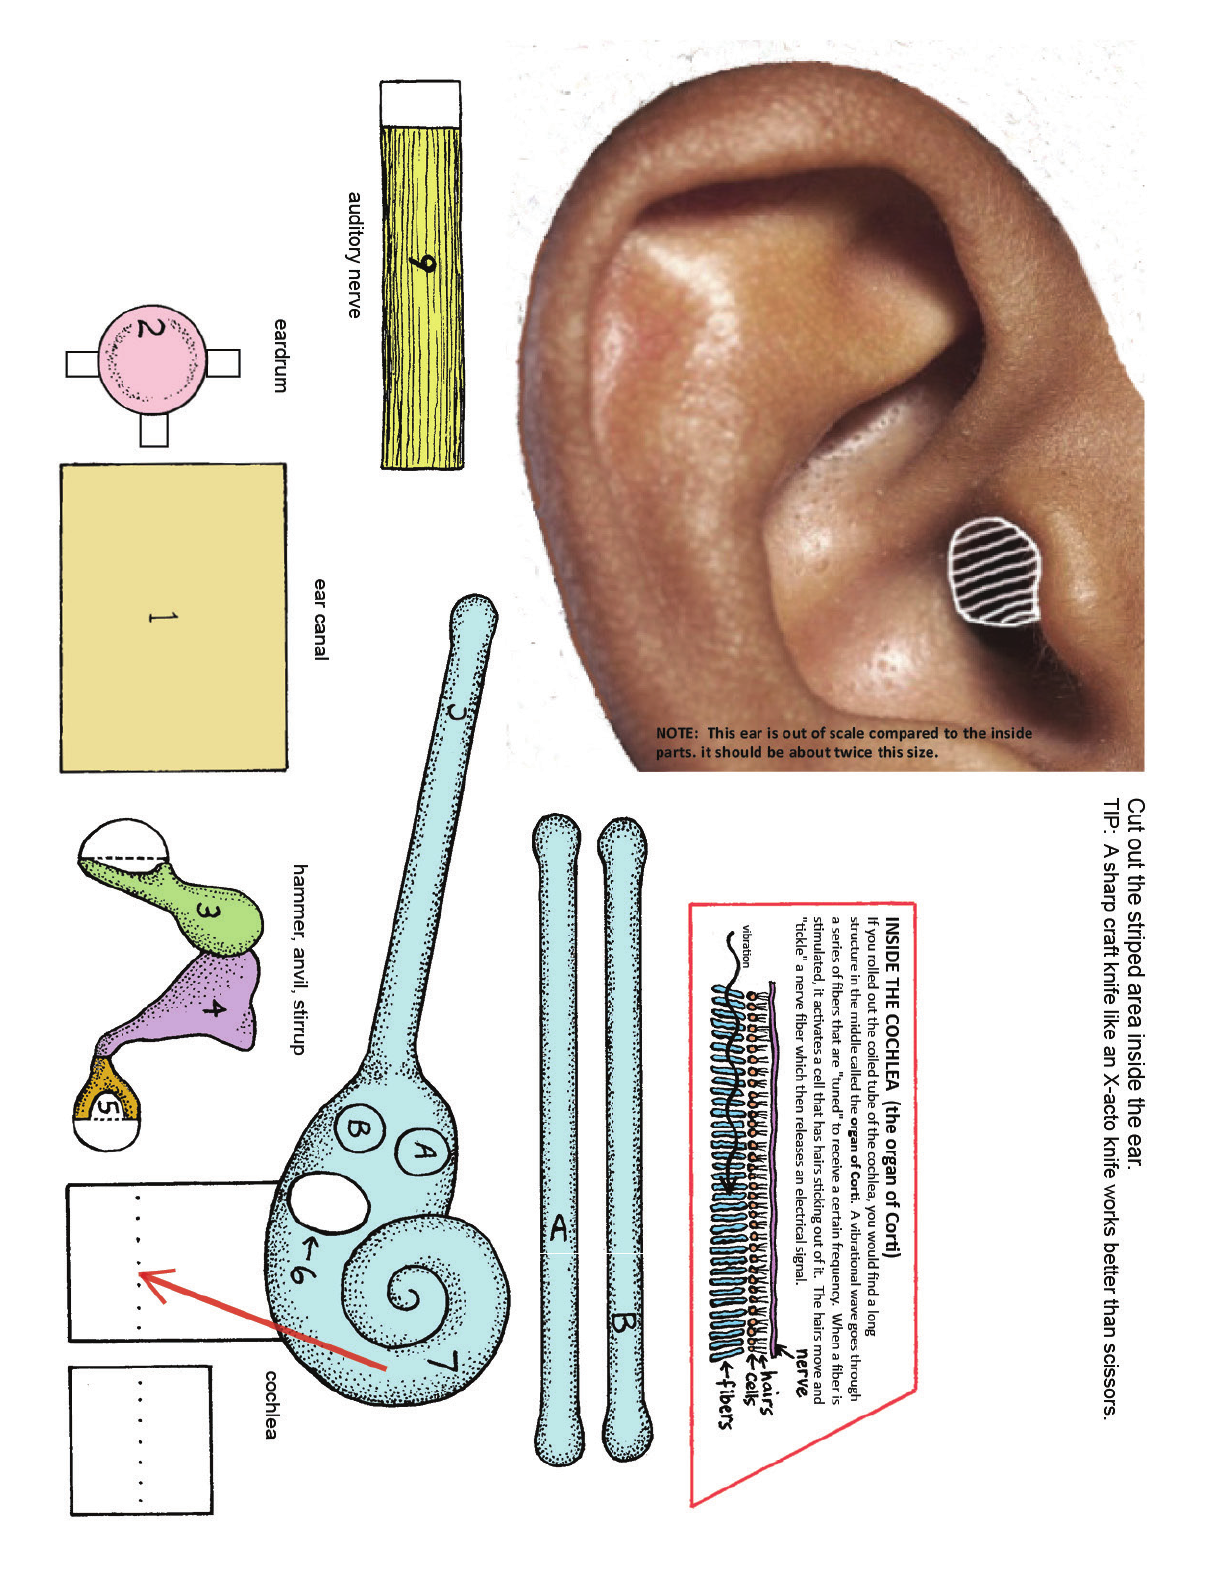
EAR PARTS:
1) Cut out all parts. Use X-acto knife to cut out striped area of outer ear (“hole” in ear).
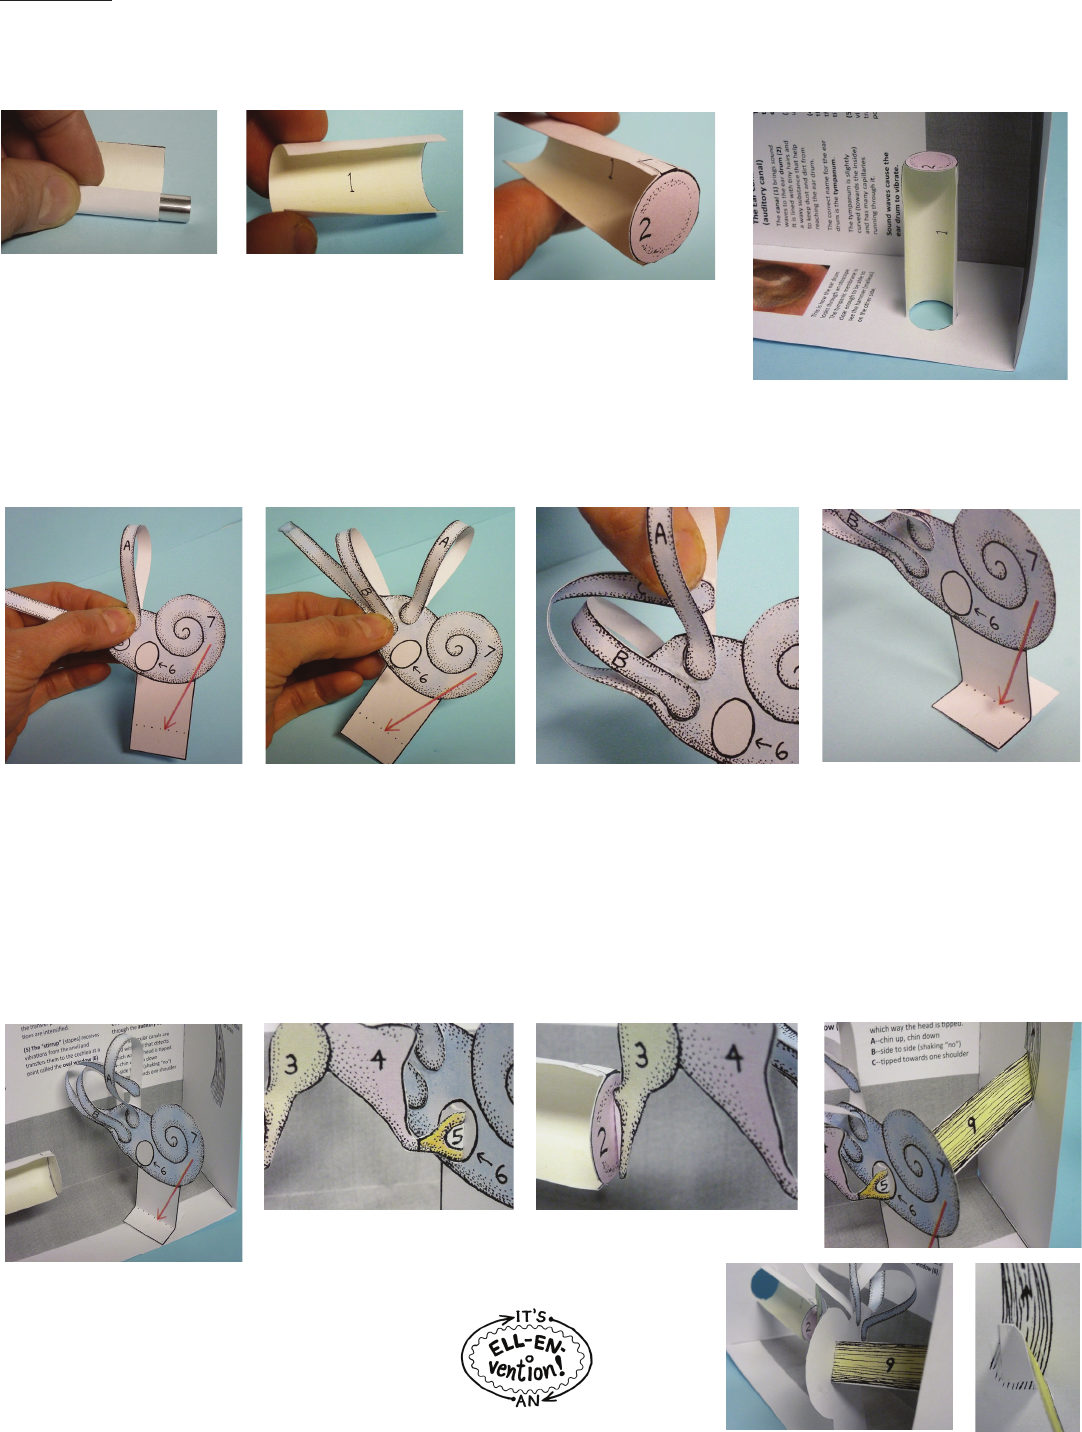
2) Roll the ear canal (1) around a pencil to make it curved into a half tube.
3) Glue the ear drum (2) to the end of the ear canal using the tabs. (Press and hold each tab for a count of 10.)
4) Glue the ear canal to the wedge-shaped tabs. In the picture, the box is tipped on its side.
5) Take the semicircular canal tab marked A, and glue it
as shown in picture, matching end of tab to circle marked A.
(Don’t forget to press and hold for at least 10 seconds before letting go.)
6) Take the semicircular canal tab marked B and glue it as shown, making sure to match end of tab to circle marked B.
7) For semicircular canal C, you will have to gently stroke and twist the long tab a bit, coaxing it into position. Manipulate
the paper so that the front (blue) side of the tab comes over and glues to the back rear A strip, as shown in picture.
(5) (6) (7) (8)
8) Fold the square piece in half along dotted line and glue to back of cochlea, making it a “foot” to stand on.
9) Glue cochlea into box on top of indicated square.
10) Fold back tab on stirrup along dotted line and glue tab to oval window, marked 6, on cochlea.
11) Fold back tab on hammer (3) and glue to eardrum.
12) Fold the glue tab on the auditory nerve (9) and glue to back of cochlea. Make an appropriate fold at the other end and
glue to bottom of picture of nerve going to brain. (A glue tab was not provided so that you can custom design your auditory
nerve to t into the space between the cochlea and the end of the box.)
13) Glue the outer ear to the left side of the
box, matching the holes. Before you apply
glue, notice that the outer ear is larger than
the box. You won’t want glue on the part that
goes beyond the box.
(2)
(3)
(4)
(2)
(9)
(10) (11)
(12)
(12)
www.ellenjmchenry.com
www.ellenjmchenry.com